Monday, December 12, 2011

Cream of Broccoli Soup

{Meatless Monday}

Hope your Monday has been a good one!!  Mine was pretty good...I just know that I ALWAYS have huge expectations of all the things I want to do.  And it's all very unrealistic...but for some reason, I repeat it every week!  ; )

This soup is a FAVORITE in our family.  Especially when I make bread bowls.  All my kids LOVE eating their soup in bread bowls, but unfortunately, I don't always have time to make them.  So it is quite a treat when I do!


Here's what you'll need:

3 cups broth
1/2 medium onion, chopped
1 head broccoli, chopped
3-4 med. potatoes, diced


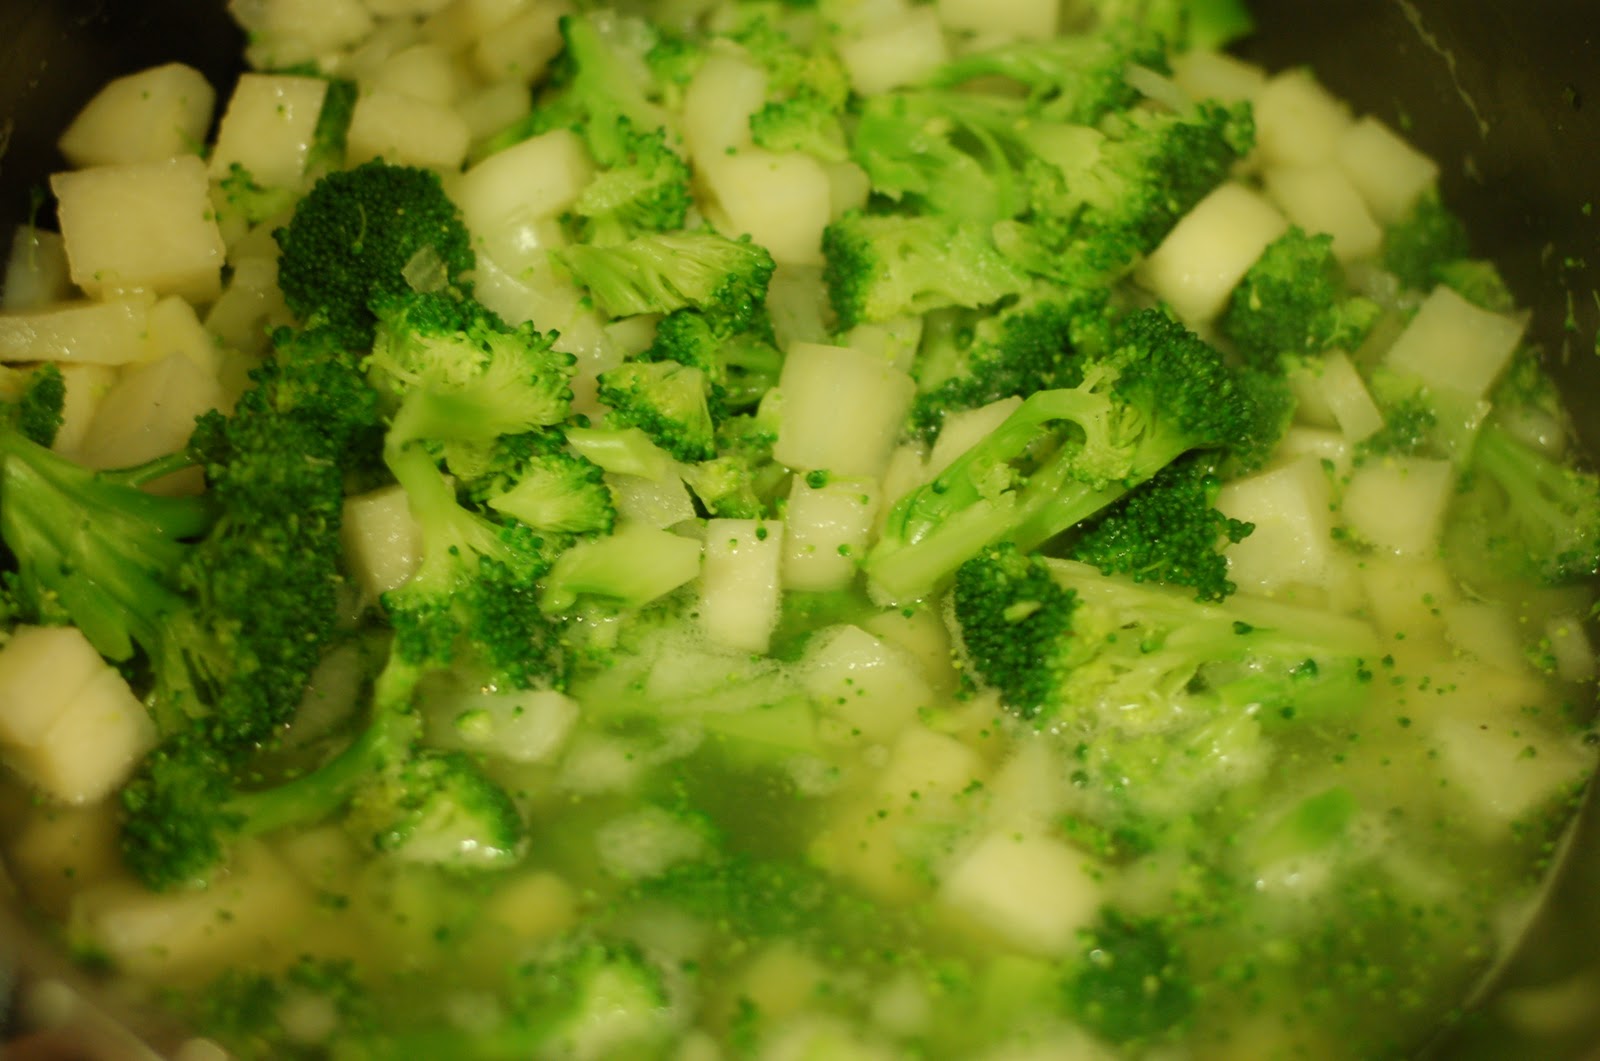
Boil all together until vegetables are tender...about 20-25 minutes.

Meanwhile...  make a white sauce...

1/2 cup butter
3/4 cup flour
2 cups milk

1 1/2-2 cups cheese (a mixture of mozzarella and cheddar is best...I also love a little pepper jack!)

Melt butter in saucepan until just slightly browned.  Stir in flour until paste is made.  Whisk in milk and stir over medium heat until the sauce thickens.

At this point, you can add the cheese to the sauce...  Or you can add the sauce to the veggies and THEN add the cheese.  Basically, you just stir everything together, add extra milk if necessary and season with salt and pepper.  If you want it chunky, leave as-is.  But if you want it creamy, grab your potato masher and go to town until the soup is your favorite consistency!

Serve in a delicious homemade bread bowl and top with extra cheese.  This is often requested for birthday dinners by our children.  There is just something extra special about your very own bread bowl.

Friday, December 9, 2011

Six Week Menu

I am SO excited to share this with you!!  It has been a wonderful thing for me...it has changed my life when it comes to cooking!  I love, love, love having it all planned out and my favorite part is that ALL the thinking has been done!  It makes shopping day so easy.  


Obviously, my six week menu is an all vegetarian menu...so you probably can't just "copy and paste" for your family.  But I really encourage you to try this out!  Go through your recipe books, the blogs you follow, the things you've found on Pinterest and MAKE A LIST!  Then separate them into "weeks" with a good variety.  Since this is Winter, I included one soup recipe every week.  I figure during the Summer, I can swap them out for our favorite salad recipes.  

I have a large family, so we rarely have a lot of leftovers.  Whatever leftovers we have just get taken for lunch or eaten after school.  I plan on making a new recipe each night, but sometimes when we happen to have a good amount of leftovers from a couple nights, I will just serve those instead of making what is on the menu.  It is very flexible.

One huge benefit of having EVERYTHING planned for me is that I was able to think about what kind of meal we need on each day.   For instance, on Mondays, I teach piano from 3:30 to 5 pm, so I chose a quick and easy meal for each Monday...one that could be done in under 30 minutes.  
And on Tuesdays, I teach a children's choir from 5-6 pm, so I chose a meal that I could make ahead in the afternoon and then my kids could pop it in the oven while I am gone to choir and then we can be eating by 6:20 pm.

Every other day is fairly unscheduled, so I was able to use those nights for recipes that took a little more time.  Fridays are often our date night, so every Friday I chose a very easy meal that my kids can cook.  I have 3 older girls who are all very handy in the kitchen, so it isn't a problem.

When I say ALL of the thinking has been done...I mean ALL!!  

I have created a shopping list for each week and simply made multiple copies.   I put my full six week menu and all the copies of the shopping lists in a folder on my "office" counter in the pantry.  I also made an index card for each week's menu that I put on the side of my fridge so that anyone can quickly look and see what we are having that night.  That way I don't have to be going to the folder all the time and my kids or hubby could (in theory ; ) start preparing because they would KNOW what I was planning on making.  


On Monday morning when it is time to go to the grocery store, I simply pull out a copy of that week's shopping list...cross off the items I know I have in my fridge or pantry...add things like milk or bread, etc...and off I go!  

I. love. it.


So....here it is!  Most of the recipes are ones I have already posted.  I have made them all links for you.

Six Week Menu
Week One
F egg and rice burritos


Week Two

T     fettucinne alfredo
F     breakfast for dinner
Sat  bean and rice burritos


Week Three
M fried rice
T potato corn chowder
F noodles and white sauce
Sun pasta bake
Week Four
M     hummus wraps
W     broccoli soup
F      pesto pizzas
Sun  calzones


Week Five
T      bean and rice enchiladas
Th    vegetarian lasagna
F boiled egg quesadillas

Week Six
W vegetable pot pie


Here are two sample shopping lists...


Thursday, December 8, 2011

Grandpa Leavitt's Fudge

Just posted my Christmas fudge recipe over at my other blog...check it out here.

Here's a little peek at the rich, creamy, yumminess!  ; )


Hope you are all having a wonderful Christmas season!  I'll be back here on Monday with another Meatless Monday!  Have a great weekend.

Wednesday, November 30, 2011

Spaghetti with Savoy Cabbage

{Meatless Monday}

Better late than never??  ; )

This recipe was quite a surprise!  I saw it and thought it looked interesting...so I tore it out of my Martha Stewart Living magazine.  It was on the side of my fridge for many months, when I finally had half a head of cabbage that needed to be used and I remembered this recipe.

I did not use Savoy cabbage...I just used the plain cabbage from the grocery store.


I really liked the cabbage once it was sautéed.  And the breadcrumbs really added to the flavor.  I took their suggestion and topped the whole bowl with some fried eggs.  And we ended up really liking it.  In fact.... (drum roll, please....)  ALL of my kids ate their plate full without a word of complaint and my youngest asked for seconds and thirds!  That sealed the deal...it's a KEEPER!

Here's what you need!


  • 8 ounces spaghetti or angel hair pasta
  • 5 tablespoons unsalted butter
  • 1 garlic clove, very thinly sliced or minced
  • 1/2 cup fresh breadcrumbs (I just used our own whole wheat bread)
  • 9 cups thinly sliced savoy cabbage (from 1 medium head)
  • 1/2 cup water
  • 3 tablespoons heavy cream
  • 1/4 cup finely grated Parmesan cheese (1 ounce), plus more for garnish
  • Coarse salt and freshly ground pepper

  • Bring a pot of salted water to a boil. Cook pasta according to directions.  Drain, but 
  • reserve 1/2 cup liquid.
  • Meanwhile, melt 2 tablespoons butter in a skillet. Cook garlic until fragrant, about 1 minute. Stir in breadcrumbs. Season with 1/2 teaspoon salt and 1/4 teaspoon pepper. Cook, stirring, until breadcrumbs are golden brown, 4 to 5 minutes.  Set aside.  
  • Melt remaining 3 tablespoons butter in a large high-sided skillet over medium-high heat. Add cabbage, 1/2 teaspoon salt, and 1/4 teaspoon pepper. Toss to coat. Cook, stirring, until slightly wilted, 3 to 4 minutes. Add 1/2 cup water. Cook, covered, until tender, about 4 minutes. Uncover, and let any water in the skillet evaporate. Stir in cream. Cook until sauce is reduced and thick enough to coat cabbage, about 1 minute. Season with salt and pepper.


  • Add pasta and reserved 1/2 cup cooking liquid to cabbage. Cook for 1 minute. Stir in cheese. Transfer to a platter. Sprinkle breadcrumb mixture over top, and garnish with more cheese.  Top with fried eggs, if desired.


  •  If I were serving this for someone other than my family, I would have fried the eggs in a prettier fashion.  But I just threw four eggs in the breadcrumb skillet (so they'd have all that yummy flavoring), then basically cut them apart to flip and then top off the bowl.  Here's what it looked like before I served it.


    I loved that most of the liquid was water and pasta water with just a few tablespoons of the cream.  I really can't wait to make this again.  Try it...it is really quite easy and I loved the different textures.  And best of all...there was no mutiny at the dinner table!

    Thursday, November 24, 2011

    Happy Thanksgiving!!

    Before I get started on my MANY hours of cooking, I thought I would do a quick post.

    I am thankful for so many things today...
    Family
    Friends
    Health
    The Gospel of Jesus Christ
    and all the other wonderful blessings I enjoy in my life.  Life is good.  Somedays it is harder to remember than others.  That is why I LOVE Thanksgiving.  But I must confess that my love of today is often muddied by the hours and hours of cooking I have to do just for our small family to have one meal.  We have so many years (like this year) where it is just us...and it is hard to simplify since there are so many favorites and we ONLY make them at Thanksgiving.

    So this is what we have decided on...
    Turkey Breast--cooking right now in the crock pot!! Hooray!  So EASY!! I was adamant that I did not want to do a big bird.  I am a person that doesn't want turkey leftovers, so I just bought the smallest one.
    I put it in breast side down with some minced onion, salt and pepper, one can vegetable broth and about 3 T butter.  (p.s.  It was AMAZING.  Hands-down the most moist turkey breast we've ever had.  We have found a new tradition!!)

    Sourdough Artichoke Stuffing--my FAVORITE thing.  I never liked stuffing until I found this!

    Corn with Wild Rice--from the Pioneer Woman...she really should have been on my list of things I am grateful for!!  ; P  My whole family L.O.V.E.S. this recipe!  It is a must have!

    Mashed Potatoes--this has become strictly my husband's affair.  While I avert my eyes, he adds all sorts of yumminess including butter and cream cheese.  I just can't bring myself to pour in the amounts that he likes, so I just try to turn a blind eye and add a few extra minutes to my workout the next day!  ; )

    Sweet Potatoes--I have done these all sorts of different ways.  Growing up, my mom made a sweet potato and apple dish that I loved.  But when I make it, I am the ONLY one who eats it and it is just not worth the effort!  This year, I was just planning on some brown sugar/marshmallow goodness.
    (p.s.  My neighbor ended up calling me right after I posted offering a pan of her sweet potatoes that she had quadrupled.  They were mashed with lots of butter, I'm sure, and topped with brown sugar and pecans and they were a HIT!  They were the only thing I went back to for seconds, thirds, and much much more than I should have eaten! ; )

    Whole Wheat Rolls--Homemade of course!!  Those were the ONLY thing I got done yesterday...well, and I made the crust for the MOST IMPORTANT PART OF THE WHOLE MEAL....

    THE PIES....We are doing three pies this year...

    Lemon Meringue...my kids favorite thing to make!  It really is a fun recipe to involve your kids in.  They love watching the filling go clear and get thick.  And then watching the egg whites beat into creamy white fluff and getting to spread it over the pie...what's not to love?  My four-year-old did the peaks all by himself...he was so very proud!  I have always thought that this was the prettiest pie of all!


    Apple...I can my own apple pie filling every fall, so this one is SUPER easy.  I make the crust, dump in a jar, and top it with crumb topping.


    Pumpkin...we LOVE pumpkin pie around here and this year I am trying a new recipe.  I got it off of a blog I follow...Ancestral Pumpkin Pie.  I'll let you know what we think!!  (p.s.  YUM...very rich and flavorful.  I think it's a keeper!)

    Hope you all have a wonderful day!  If you'd like to see some cute and simple Thanksgiving crafts my kids did,  check out my other blog post HERE.

    Wednesday, November 9, 2011

    Broken computer!

    I am sorry that I have gone missing for the last month...my desktop computer went kaput, and I haven't even had time to try and get it fixed. My hubby has a laptop from work...so if it is ever free, I will try to upload some pics. I do have 2 new recipes to post...but most of all I wanted to post my four-week menu plan that has changed my life this last month! I LOVE IT! Menus are all written out, as are the shopping lists, and all the thinking has been done in advance. It really has made dinner time SO much easier. I will be sharing that soon.

    First I have to deal with my computer...I have been avoiding it because I don't want to face the reality that it might have crashed and I might have lost a lot of stuff! :(

    One downside of the meal plan is that I am not trying new recipes as often as I used to...so I don't think I will be able to post a new recipe every Monday...but I am aiming for twice a month, so we'll see how it goes!

    Thanks for your patience...and hopefully I will be back soon!

    Monday, October 3, 2011

    Noodle Stir-Fry

    {Meatless Monday}

    I saw this one on Our Best Bites and I knew I had to try it!  I guess we don't eat very much chinese food at our table because my three youngest tried to say they weren't hungry and not eat a single bite.  My eleven year old would take a bite, gag, chew some more, and then make herself swallow.  (She REALLY wanted the orange cream bar that was for dessert!)

    But my husband and I and our two teenagers LOVED it!  ; )  So I guess the little ones will have more chances to get used to it!


    Here's what you'll need:

    1 12-oz. package linguine
    1/4 cup soy sauce (I mixed regular soy sauce with Soy Vay's Teriyaki Sauce---YUM!!)
    2 1/2 tablespoons brown sugar
    2 1/2 tablespoons rice vinegar
    2 tablespoons Asian sweet red chili sauce
    1 tablespoon dark sesame oil
    1-2 tablespoons canola or peanut oil
    1 small red onion, sliced
    4 cloves garlic, minced or pressed
    2 tablespoons fresh ginger, minced or pressed
    1 large red or yellow pepper, sliced
    1 cup fresh or frozen green sugar snap peas, snow peas, edamame, or green beans
    1 medium zucchini, julienned

    This was the first time I have used fresh ginger and we LOVED it!  I was most excited about this recipe because it is such a change from what we are normally eating.  Hooray for variety!  ;)

    Instructions:
    Cook linguine according to directions.  Drain and then toss with 1 T. olive oil.

    Whisk together the soy sauce, brown sugar, vinegar, sweet chili sauce, and dark sesame oil. 
    Set aside.  (I actually didn't use dark sesame oil...just regular oil...and the only sweet chili sauce I could find was PRICEY, so I bought a cheaper garlic chili sauce that is listed as one of the ingredients in the pricey one and just used a little bit to give it some of the asian heat.)


    While the noodles are cooking, heat a large skillet over high heat. Add the sliced onions, garlic, and ginger with the canola/peanut oil. Stir fry 1-2 minutes or until fragrant, but the garlic isn’t burning. Add the peas/beans and stir fry for about 30 seconds.   (I meant to get pics of the steps...but then the evening turned to chaos, and I forgot! ; )

     (cut up your zucchini into small spears)

    Add the zucchini and peppers and stir fry for another minute or two until the veggies are crisp-tender. Add the noodles and stir fry until the noodles are well-combined with the vegetables. Drizzle the sauce evenly over the noodles and stir fry the entire mixture for a minute or until everything is well-coated in the sauce. Serve immediately–garnish with chopped cilantro or lime wedges.


    Monday, September 26, 2011

    Mediterranean Stuffed Tomatoes

     {Meatless Monday}

    I found a couple new blogs last week and this recipe caught my eye!  It looked perfect for the end of summer with all the tomatoes coming off...and it has feta cheese, so it was perfect for us!
    This recipe came from Cookie and Kate.  Head on over and check out all the other great recipes!


    Here's what you'll need:

    1 cup cooked red or black quinoa
    8 medium tomatoes
    1/3 can quartered artichokes, chopped
    1/2 cup feta, plus extra for topping
    15 kalamata olives, sliced
    1 tablespoon olive oil
    2 cloves fresh garlic, minced
    salt and pepper, to taste

    I actually used some leftover short-grain brown rice instead of the quinoa.  It was just something in my fridge that needed to be used...and I thought it turned out great.  I have just started using short-grain brown rice and I love it.  It is much more palatable than the long grain variety.  My kids and I love it, but I still can't convince my husband!  : )

    But if you are using quinoa...here's the directions for cooking it:
     Measure out 1/3 cup of quinoa, pour into a mesh colandar, and rinse the quinoa under running water for a minute. Pour the rinsed quinoa into a small pot and add 2/3 cup water.  Bring to a boil, then cover and simmer for 15 to 18 minutes. Remove from heat, let sit for a few minutes, and fluff with a fork. 1/3 cup uncooked quinoa should yield a little over one cup cooked quinoa.
    Preheat oven to 375 degrees. 


    Core the tomatoes by slicing off the top 1/8 inch of each tomato.   

    Using a small knife and your fingers, take out the center of the tomato.

    In a medium bowl, mix together the filling (cooked quinoa, feta, artichokes, olives, olive oil and garlic).  Add salt/pepper to taste. 


    Spray your dish with cooking oil and brush the tops of the cored tomatoes with olive oil.  Use a spoon to stuff the tomatoes with the quinoa mixture.  Top each tomato with extra feta.  Bake for 15-20 minutes, until the feta starts to turn golden.


    Serve immediately....mmmmmm.

    Monday, September 19, 2011

    Asparagus Quiche

    {Meatless Monday}

    This is a recipe that I made up one night for my book club.  It turned out so yummy, I thought I would share it here.
    I basically just threw together some vegetables that I had already...asparagus, mushrooms, onions, and artichoke hearts...with some eggs, milk, and salt and pepper.

    The first step to a good quiche is a good CRUST!  I use the basic recipe in my Betty Crocker cookbook that is almost 20 years old...but I do have a few tricks that I think help it be flakier and therefore yummier! ; )

    I use shortening for most of the fat, but then I add in about 2-3 T. COLD BUTTER sliced thinly.  Then cut it into the flour and salt using a pastry cutter.  Then I use ICE COLD water and only as much as you need to get it to just stick together.  And lastly, I roll it out between sheets of wax paper so I don't have to add any extra flour. 

    I made my quiche by first sauteeing the vegetables to soften them up and give them a little flavor with some salt/pepper/garlic.

    Then I cut them into small pieces for the quiche.

    Mix together 6-8 (depending on the egg size and pie pan size) eggs with about 2 cups milk. If you happen to be using fresh eggs...like me...then reduce the milk down to about 1 1/2 cups.  Fresh eggs still have so much more moisture in them.  I have learned the hard way by having my quiches be a little too soft and watery.

    Salt and pepper generously with your shakers.  Place veggies in the bottom of the uncooked pie crust (you can also precook the crust for just about 5 minutes to MAKE SURE it gets cooked well on the bottom, but I am often in too much of a hurry!)

     If you want, you can grate some cheese over the vegetables before you pour the eggs in.  Cheddar, mozzarella, or pepper jack would all work well.  I just used a little medium cheddar that I always have on hand.

    Pour egg mixture over.  Bake at 375 for 40-50 minutes.  The baking time is pretty approximate.  It all depends on how many eggs vs. milk I throw in.  But it is never less than 40 minutes.  Just keep checking until it looks done and pretty much firm in the middle.  If your crust is getting too dark, you can always put foil strips around the edges.

    We end up making quiche for dinner whenever we are getting stocked up on eggs from our little chicks!  ; )  You'll probably notice that whenever I make time consuming breakfast items (ie..anything other than cereal or oatmeal) I am making it for dinner.  I am just not that much of a breakfast baker...muffins every once in a while...but other than that, we have all of our pancakes/waffles/quiche etc. for dinner.  Most of the time when Dad is working late and the kids are ecstatic to eat breakfast for dinner...and it is super easy for Mom!

    Monday, September 12, 2011

    Greek Spinach Veggie Burgers

    {Meatless Monday}


    Just a super quick post tonight...I am in the middle of canning season and I have SO little extra time! ; )

    We made these the other night and they were FABULOUS!!  Everyone liked them!  They are such a yummy veggie burger.  We used some of the Cajun mayonnaise that goes with the Southern Sliders...so yummy!

    So...I am sorry to be completely lazy...but here's the link to the recipe.  My pictures definitely DID NOT turn out well on this one, so I thought you might like to see what they could look like! ;)

    One change that I made....  I had some fresh spinach that needed to be used, so I chopped that up instead.  But I ended up adding another egg and some bread crumbs to hold them all together.

    Monday, August 29, 2011

    Roasted Vegetable Pizza

    {Meatless Monday}


    Hello, hello!!   I have got a SUPER yummy one for you today!  This one is off the Pioneer Woman's site.  I love it when she posts vegetarian ideas because I always know they will be amazingly delicious like everything else she cooks.

    She actually grills the vegetables and therefore calls her recipe Grilled Vegetable Pizza.  But I don't have a grill...so I just ROAST! ; )  I also made a few other minor changes to the recipe.

    I have fallen in love with roasted vegetables!  They are so flavorful...the roasting just really brings out the best flavor in the vegetable.  I have even tried Brussels sprouts...and they were SO good.  A LONG time ago, I posted the Roasted Vegetable Lasagna...if you haven't made that yet...you should!  Yum!

    This is a simple pizza that I decided to make for my book club and it was so easy and such a great thing to make on a summer day.  I LOVE that it uses Pesto for the sauce.  We all love pesto and we always have our little frozen "pucks" ready in the deep freeze.  Here's the post about freezing our pesto. (Scroll down to the bottom for the pesto instructions.)

    This was the first time I made her Pizza Crust recipe...and I really liked it.  It was easy and I liked the way it turned out.  I always use Whole Wheat flour that I grind at home and it wasn't too dry at all.

     Pizza Crust 
    1/2 teaspoon Active Dry Yeast 
    3/4 cups Warm Water 
    2 cups All-purpose Flour 
    1/2 teaspoon Kosher Salt 
    3 Tablespoons Olive Oil 


    Pesto 
    3/4 cups Fresh Basil Leaves 
    1/2 cup Grated Parmesan Cheese 
    2 Tablespoons Pine Nuts 
    2 cloves Garlic, Peeled 
    Salt And Pepper, to taste 
    1/3 cup Extra Virgin Olive Oil 

    TOPPINGS: 
    2 whole Zucchini, cut diagonally
    2 whole Summer Squash, cut diagonally
    Olive Oil 
    1 whole Yellow Bell Pepper 
    1 whole Red Bell Pepper 
    12 ounces, weight Fresh Mozzarella, Sliced (I just used regular mozzarella cheese)
    4 ounces, weight Goat Cheese 
    Extra Basil Leaves, For Garnish 
    Grated Or Shaved Parmesan Cheese

    CRUST INSTRUCTIONS:
     Sprinkle yeast over 3/4 cups warm water. Let stand for a few minutes.
    In a mixer, combine flour and salt. With the mixer running on low speed, drizzle in olive oil until combined with flour. Pour in yeast/water mixture and mix until the dough comes together in a sticky mass.  You don't want to add too much flour!  Just enough to be able to handle it a little.
    Coat a separate mixing bowl with a light drizzle of olive oil, and form the dough into a ball. Place ball in bowl and cover and set it aside for 1 to 2 hours.  ( I think I only had about 20 minutes and it turned out fine.)

    PESTO INSTRUCTIONS:
     Add basil leaves, 1/2 cup Parmesan, pine nuts, and salt and pepper to a food processor. Turn machine on, then drizzle in olive oil while it mixes. Continue blending until combined, adding additional olive oil if needed. Set aside.

    TOPPINGS:
     Brush zucchini and summer squash slices with olive oil. Sprinkle with salt and pepper. Grill over medium heat until vegetables are tender and have nice grill marks. Set aside. (Or broil for 10 minutes, then turn and broil until done.)
    Place whole peppers on grill (or under broiler) and allow to blacken. Remove from grill and immediately place in a large ziploc bag. Allow to sit for 20 minutes or so, then remove peppers from bag and peel off blackened skin. Deseed peppers, then slice into strips. Set aside.

    Preheat oven to 475 degrees. Arrange a rack toward the bottom of the oven.
    To assemble the pizza: Roll out pizza dough on a floured surface; get it as thin as you can. spread a generous layer of pesto all over the surface of the crust. (You might have a little left over; if you do, store in the fridge.)
    Lay slices of mozzarella all over the pesto. Arrange grilled zucchini, squash, and peppers in a pretty pattern on top of the mozzarella.

    Bake for 15 to 18 minutes, or until crust is golden brown and cheese is bubbly (watch to make sure cheese doesn't get too brown.)
    Remove from oven and crumble goat cheese all over the top of the pizza. Lay basil leaves on top, sprinkle with Parmesan, and serve immediately.
    This was most definitely a keeper!  I love that it uses zucchini and summer squash because we have been getting A LOT of those to use out of the garden!