Showing posts with label FAVORITES. Show all posts

Wednesday, June 19, 2013

Sweet Potato and Black Bean Enchiladas

{Meatless Monday}

...even though it is not really Monday at all!

I got this recipe off one of my favorite vegetarian cooking blogs.... A Couple Cooks.

This was REALLY yummy.  Surprisingly yummy!   I bookmarked the recipe more out of curiosity than anything.  It was one of those times when I thought, "well, I like sweet potatoes....and I like black beans...but will I really want to eat them together??"  ; )

But, yes, oh yes, you want to eat them together!  This was a keeper and I can't wait to make it again.

Here's what you'll need:

2 medium to large sweet potatoes (3 cups diced)
15 oz. can black beans
8 ounces canned diced green chilies (about 1 cup)
1 medium red onion
½ tablespoon cumin
1 tablespoon chili powder
½ teaspoon garlic powder
½ teaspoon kosher salt
Fresh ground pepper
about 2 cups salsa verde (or homemade tomatillo salsa)
1 cup Colby jack cheese, shredded
8 whole wheat flour tortillas (or 10 6-inch)
Sour cream
Fresh cilantro, to garnish


Preheat the oven to 350°F.

 Peel and dice the sweet potato. Place in a pot and cover with water; add a pinch of salt. Bring to a boil and cook until tender, around 12 to 15 minutes. Drain and place in bowl.

Now to prepare the filling:  Finely chop the red onion. (I decided to saute my onion for about 5-7 minutes.  It helps my kids to eat them better!)


To Mix the Filling:  In a large bowl, combine the cooked sweet potato, drained black beans, red onion, green chilies, ½ tablespoon cumin, 1 tablespoon chili powder, ½ teaspoon garlic powder, ¼ to ½ teaspoon kosher salt, and fresh ground pepper. Mix to combine.
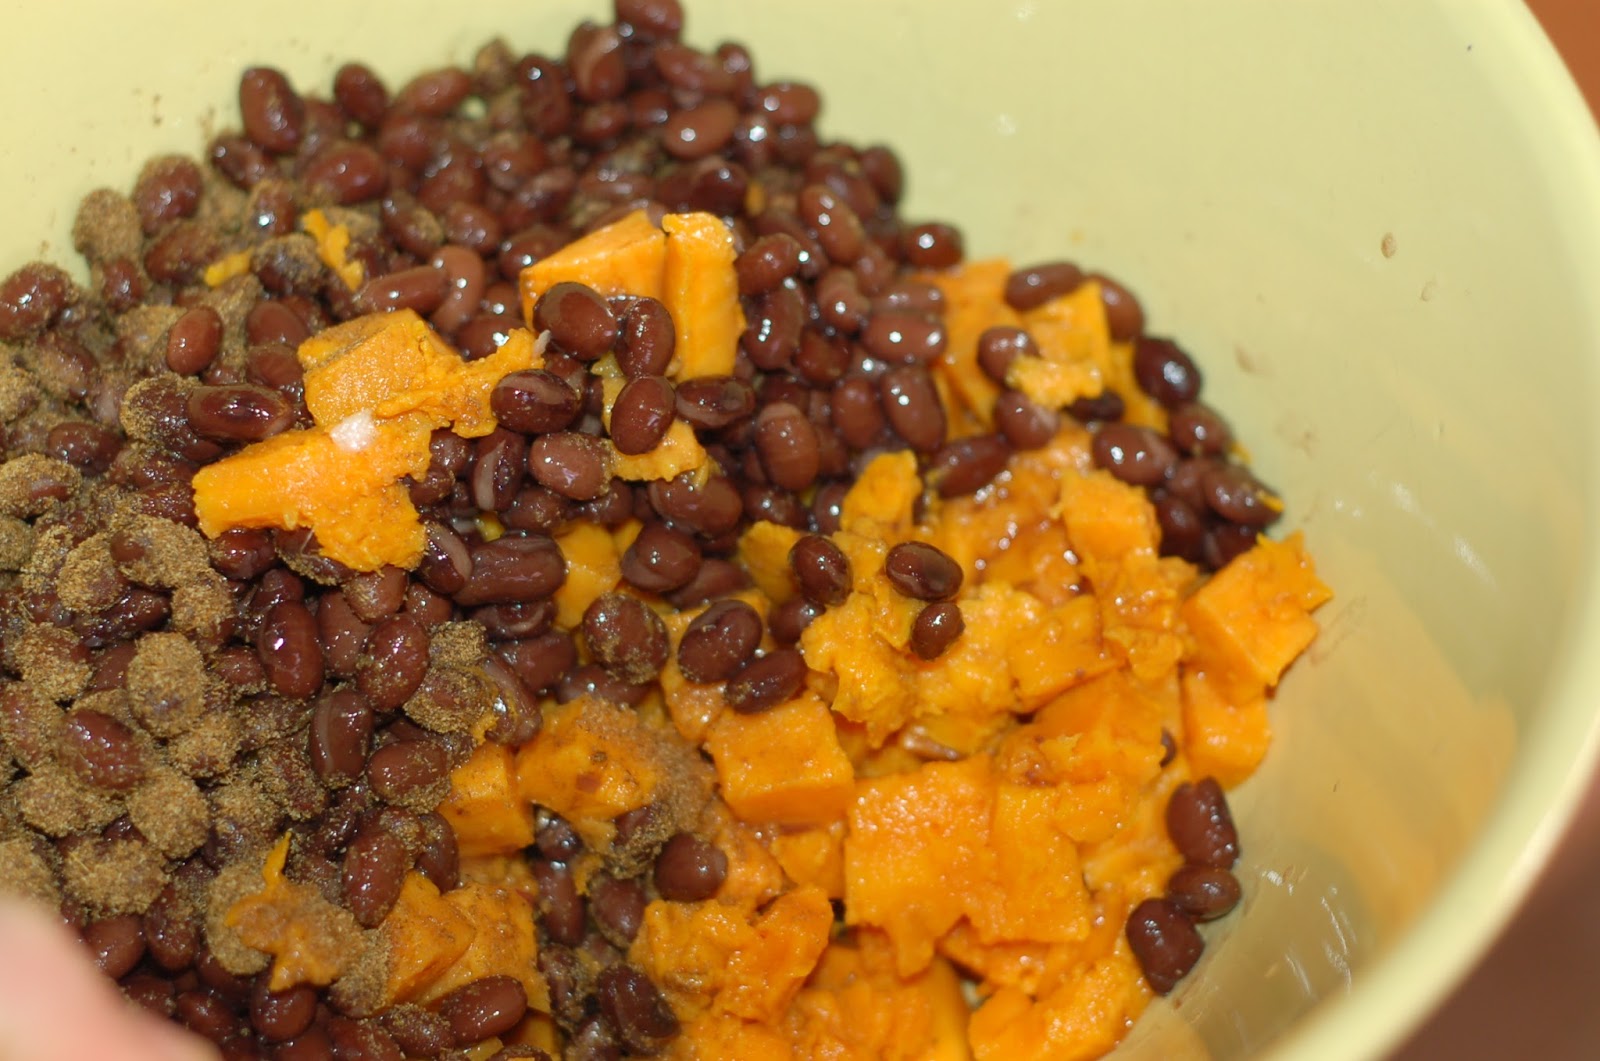


To make the enchiladas... In a large baking dish, spread ¾ to 1 cup of the salsa verde. Fill each tortilla with a heaping ½ cup scoop of the filling, add a handful of cheese, and roll it up. 


Place the enchilada seam-side down in the baking dish. Repeat for the remaining tortillas. When all enchiladas are in the dish, top with the remaining salsa verde (about ½ cup or so) and the remaining cheese.

Place in the oven and bake for 20 minutes, until the cheese is melted.

Serve, garnished with sour cream (mixed with a tiny bit of water to loosen it) and chopped cilantro, if desired. (I only had romaine lettuce, but sour cream & cilantro would be fabulous!) 


Monday, September 10, 2012

Butternut Squash Pasta Sauce

{Meatless Monday}


This is a recipe that I have had marked for a very long time.  It comes from Everyday Food back in 2006!  I can't believe it took me so long to try it.  I LOVED it.  The flavor is amazing.  


Here's what you need:

  • 1 medium butternut squash (about 1 1/2 pounds)
  • 1 medium onion, cut into small wedges
  • 1 tablespoon olive oil
  • 1/2 teaspoon dried rubbed sage (I left this out...I didn't have any)
  • Coarse salt and ground pepper
  • 5 cloves garlic, peel on
  • 1 cup half-and-half
  • Pasta (such as cheese ravioli or any short pasta), for serving
  • Toppings, such as grated Parmesan cheese, chopped toasted walnuts, finely chopped fresh sage

I actually added the onion to the recipe...because in my opinion, EVERYTHING is better with roasted onion in it!! ; )


This picture was taken before I decided to add the onion....


 Preheat oven to 375 degrees. Cut the top and bottom off of  your squash.  Peel entire squash with vegetable peeler, then cut in half and scoop out seeds. 

Cut squash into 1-inch chunks; transfer to a cookie sheet. Toss with onion, oil, and sage; season with salt and pepper. Place garlic on cookie sheet. 
(So you might notice that my pieces are NOT 1" chunks.  I had the hubby cut mine and forgot to give those directions...but the good thing was, I think they cooked a little faster because they were so small. ; )
   
  I recommend you put all the cloves in one place.  I had a heck of a time getting all the little cloves out from among my veggies.  And you HAVE to find them to remove the skins.  


Roast until squash is very tender, about 30-35 minutes, tossing once halfway through. 
Remove and discard skin from garlic.


Blend squash, onion, and garlic into a puree, using blender or food processor. With motor running, add half-and-half; process until smooth. Add 1 to 2 cups  water; continue to process until smooth, adding water to thin if necessary. (I was using my blender and HAD to add the water at the beginning to even get the thing to blend at all.)  Season again with salt.  I ended up adding quite a bit of water.  For sure the full 2 cups and maybe more.  I transferred it all to a pot and heated it back up.  

At this point, I started tasting it...and I couldn't stop!!  Yum...it is so creamy and so flavorful.  I think I just want to live on a diet of roasted vegetables and dark chocolate!  ; )


Cook pasta according to package instructions.  Drain pasta and return to pot.  Now, at this point you have two choices of how to serve it.  The recipe says that you can reserve a little pasta water and then stir all the sauce together with the pasta, using the pasta water, if necessary to thin. I chose to serve mine individually, so that they would look prettier.  
I topped ours with chopped walnuts and grated parmesan cheese.


I finished my serving and then just helped myself to another scoop of the sauce.  Who needs pasta when the sauce is this amazing??  

Friday, December 9, 2011

Six Week Menu

I am SO excited to share this with you!!  It has been a wonderful thing for me...it has changed my life when it comes to cooking!  I love, love, love having it all planned out and my favorite part is that ALL the thinking has been done!  It makes shopping day so easy.  


Obviously, my six week menu is an all vegetarian menu...so you probably can't just "copy and paste" for your family.  But I really encourage you to try this out!  Go through your recipe books, the blogs you follow, the things you've found on Pinterest and MAKE A LIST!  Then separate them into "weeks" with a good variety.  Since this is Winter, I included one soup recipe every week.  I figure during the Summer, I can swap them out for our favorite salad recipes.  

I have a large family, so we rarely have a lot of leftovers.  Whatever leftovers we have just get taken for lunch or eaten after school.  I plan on making a new recipe each night, but sometimes when we happen to have a good amount of leftovers from a couple nights, I will just serve those instead of making what is on the menu.  It is very flexible.

One huge benefit of having EVERYTHING planned for me is that I was able to think about what kind of meal we need on each day.   For instance, on Mondays, I teach piano from 3:30 to 5 pm, so I chose a quick and easy meal for each Monday...one that could be done in under 30 minutes.  
And on Tuesdays, I teach a children's choir from 5-6 pm, so I chose a meal that I could make ahead in the afternoon and then my kids could pop it in the oven while I am gone to choir and then we can be eating by 6:20 pm.

Every other day is fairly unscheduled, so I was able to use those nights for recipes that took a little more time.  Fridays are often our date night, so every Friday I chose a very easy meal that my kids can cook.  I have 3 older girls who are all very handy in the kitchen, so it isn't a problem.

When I say ALL of the thinking has been done...I mean ALL!!  

I have created a shopping list for each week and simply made multiple copies.   I put my full six week menu and all the copies of the shopping lists in a folder on my "office" counter in the pantry.  I also made an index card for each week's menu that I put on the side of my fridge so that anyone can quickly look and see what we are having that night.  That way I don't have to be going to the folder all the time and my kids or hubby could (in theory ; ) start preparing because they would KNOW what I was planning on making.  


On Monday morning when it is time to go to the grocery store, I simply pull out a copy of that week's shopping list...cross off the items I know I have in my fridge or pantry...add things like milk or bread, etc...and off I go!  

I. love. it.


So....here it is!  Most of the recipes are ones I have already posted.  I have made them all links for you.

Six Week Menu
Week One
F egg and rice burritos


Week Two

T     fettucinne alfredo
F     breakfast for dinner
Sat  bean and rice burritos


Week Three
M fried rice
T potato corn chowder
F noodles and white sauce
Sun pasta bake
Week Four
M     hummus wraps
W     broccoli soup
F      pesto pizzas
Sun  calzones


Week Five
T      bean and rice enchiladas
Th    vegetarian lasagna
F boiled egg quesadillas

Week Six
W vegetable pot pie


Here are two sample shopping lists...


Monday, May 30, 2011

Spaghetti with Artichokes

{Meatless Monday}


I promised to post this about a month ago....   This has become an absolute favorite!  It is so simple and easy and is such a great spin on traditional spaghetti with red sauce.  It probably ends up on my menu about every other week.  I just love it because it is simple and cheap and really good!

This is another recipe from The Pioneer Woman...if you have never been to her blog, click on over!  She is amazingly talented and her pictures are gorgeous.  But make sure you have some free time, because you can get lost in all the splendor! ; )

Here's what you need for this super easy meal...

]2 Tablespoons olive oil 
2 Tablespoons butter 
3 cloves garlic, minced 
½ whole medium onion, diced
1 can Artichoke Hearts (14.5 Oz.) drained 
1 can diced tomatoes with juice (14.5 Oz.) 
1 cup heavy cream 
½ cups chicken broth (more as needed) 
½ teaspoons nutmeg 
Salt and Pepper, to taste 
1 pound Thin Spaghetti 
1 cup Parmesan Cheese, freshly grated 
2 Tablespoons fresh chives, chopped


Cook spaghetti as desired.  Drain and set aside.
Melt olive oil and butter in a large skillet over medium heat. Add onions and garlic and saute for 2-3 minutes.
Add artichoke hearts and tomatoes. Stir and cook for 8-10 minutes. Reduce heat to low. Stir in cream and chicken broth. Add salt and pepper to taste.  Cook over low heat until heated through, then turn off heat.
Place drained pasta in a large bowl. Sprinkle with 1 cup Parmesan. Pour sauce over the top. Add chives. Toss lightly to combine.  Enjoy!


Monday, May 2, 2011

Southern-Style Veggie Sliders

{Meatless Monday}

I love it when I find a recipe that is a total KEEPER!!  These look kind of strange at first glance!  I had the hardest time finding canned Black Eyed Peas at Walmart...and I think I've maybe used one recipe in my life that called for them.

This recipe was the 2nd place winner in BH&G for Veggie burgers.  It was so good, I can't wait to try the 1st place winner: Greek Spinach Veggie Burgers.  Mmmm.  Anything with feta is my friend!

My family loved these.  EVERYONE ate them and wanted more!  To actually get through dinner without any complaints is such a miracle...I might make these on a weekly basis!  I served them on my own homemade rolls that I had toasted in the oven...so I think that made them extra yummy!

The slightly spicy mayonnaise adds a yummy twist...but it wasn't even too hot for my little ones.

So if you've never tried a veggie burger...you really should try this one!!  BUT,  you have to know that they in NO way taste like a burger in flavor or texture.  But they are super yummy in their own right.  My husband liked them so much he suggested that I make up a huge batch, shape them into patties and then freeze them for him...instead of buying those expensive Boca burgers.  I think when I go to Walmart today, I will snag a few cans of Black Eyed Peas and try it out!!


So, here's what you need: 
2  15- to 16-oz. cans  black-eyed peas, rinsed and drained 
1    egg, lightly beaten 
1/2  cup  finely chopped red sweet pepper 
1/4  cup  fine dry bread crumbs 
1/4  cup  finely chopped celery
3    green onions, finely chopped 
1/2  tsp.  garlic salt 
2  Tbsp.  olive oil 
1/2  cup  mayonnaise 
1  tsp.  Cajun seasoning ****See recipe below****
12-16   soft dinner rolls, split and toasted
    Lettuce leaves

  In large bowl mash black-eyed peas with a potato masher.


Add egg, sweet pepper, bread crumbs, celery, green onions, and garlic salt; mix well.


Shape bean mixture into twelve to sixteen  1/2-inch-thick patties about 3 inches in diameter. (One tip I have read is to refrigerate these for 30-60 minutes...she said it helped them not fall apart as much when you cook them.)


   In large skillet heat 1 Tbsp. of the oil over medium heat. Add half of the patties to the hot oil. Cook 8 minutes or until lightly browned and heated through, turning once. (I did mine all at once in my HUGE skillet.) Remove and keep warm. Repeat with remaining oil and patties.  (I cooked them until they were well browned and a little crispy on each side...just to give them a little more "bite".)


   In small bowl stir together mayonnaise and Cajun seasoning.


Spread cut side of each roll with the mayonnaise mixture. Place a burger on bottom half of each roll; top with lettuce and add roll top. Makes 12-16 sliders (6 servings).


***Cajun Seasoning Recipe***
I am not about to go to the store and spend $5 on some special mix of spices, so I simply googled Cajun seasoning and then mixed up some of my own.  Here is a link if you want to make a larger portion of it to keep in your cupboard:  Cajun Seasoning

I just basically made a small batch of it...here's what I used:
3/4 tsp. paprika
1/2 tsp. garlic powder
1/2 tsp. onion powder
1/2 tsp. ground thyme (I just chopped up my regular thyme)
1/8 tsp. ground black pepper
1/8 tsp. cayenne pepper
1/8 tsp. dried basil
1/8 tsp. dried oregano

Mix all up in a bowl.  This made enough for at least 2 or 3 recipes of the burgers.


I hope you will be adventurous and try these!!  They really are yummy and easy to put together.  I love having a new recipe that is so different from our normal fare.  We eat a lot of pasta...and lots of the new recipes I try are pastas, so I am happy to add a yummy veggie burger into the mix!

Thursday, March 10, 2011

Sleepin' In Omelette

This is a fabulous recipe that I found on the Pioneer Woman's site a number of years ago.  It is a fabulous breakfast casserole...the BEST I've ever tasted.  So much flavor and so easy to throw together!

I thought I had posted this a long time ago...and I KNOW that at some point I had pictures of it...but I can't find them anymore.  I will take pics the next time I make it...or you can head HERE to see PW's post about it.  She has about 42 pictures! ; )   I have altered her recipe a bit (she seems to be able to eat unspeakable amounts of fat and not have it transfer directly to her hips).  ; )

Sleepin' In Omelette
6 whole Onion Rolls
1 cup Grated Cheddar Cheese
4 ounces (1/2 pkg) Cream Cheese--I use Nufchatel
6 T Butter
10 whole Eggs
2 cups Milk
1 teaspoon Chopped Chives
½ teaspoons Dry Mustard
½ teaspoons Salt
1 dash Cayenne Pepper


Butter a 9×13 baking dish.
Cut onion rolls into cubes and place on bottom of 9X13. Top with shredded cheese.  Cut cream cheese into small chunks and place all over the bread.  (I use two knives to slice and place the very sticky Nufchatel chunks.) Cut butter into thin pats and place over the top.
Mix remaining ingredients and pour over the top of everything. Cover with foil and refrigerate overnight.
In the morning, bake at 325 degrees, covered, for 45 minutes. Then remove foil and continue baking at 350 for 10-15 minutes.
**I find that it will cook more quickly if it has about an hour to sit on the counter before cooking.  Otherwise, just plan for a little extra cooking time.  I also have found that in order for it to be cooked all the way to the middle the edges and bottom get a little overdone.  But they are still so yummy...we eat every last bit of this casserole!

Friday, February 25, 2011

Bruschetta Biscuits with Feta

Got this one out of my Better Homes and Gardens magazine.  We loved these!!  I love making biscuits when I want a "bread" to go along with a meal, but I need it FAST!

These ones are packed with everything delicious!

3/4 cup milk plus extra for brushing
1/3 cup olive oil
1 cup baby spinach leaves, finely chopped
1/4 cup fresh basil leaves, finely chopped
(I just threw in some of our frozen pesto--you have to scroll down for the pesto recipe)
1/4 sun dried tomatoes, finely chopped
1/4 cup olives, pitted & chopped
2 cups flour
2 tsp baking powder
1/2 tsp salt
3 Tbsp. crumbled feta cheese
1 Tbsp. pine nuts (optional)

1. Preheat oven to 425. In bowl combine milk, oil, spinach, basil, tomatoes, and olives.
2. In another bowl combine flour, baking powder, & salt. Make a well in the middle of the flour mixture; add milk mixture. Stir with a fork until moistened.
3. Gently knead dough on lightly floured surface. Pat into about an 8X8 square and cut into squares.

4. Place biscuits 1 inch apart on oiled baking sheet. Brush lightly with milk; sprinkle with feta and pine nuts.. Bake 15 minutes or until golden.  Serve with your favorite soup!

Monday, February 14, 2011

Florentine Artichoke Bake


{Meatless Monday}


This is another new recipe with artichokes that has become a favorite!  It has so much flavor with the spinach, artichokes, and sun-dried tomatoes.  

Here's what you need:

8 oz. bow tie pasta
1 small onion, chopped
1 T butter
2 eggs
1 1/4 cup milk
1 tsp italian seasoning
1/4 tsp crushed red pepper
2 c. sliced mushrooms
2 c. shredded Monterey Jack Cheese
1 (14 oz.) can artichoke hearts, drained and quartered
1 (6 oz.) package fresh spinach,  coarsely chopped 
1/2 c. sun-dried tomatoes, chopped
1/4 c. parmesan cheese
1/2 c. bread crumbs
1/2 tsp paprika
1 T butter, melted

Cook and drain pasta; set aside.  Preheat oven to 350*.

Saute onions in butter for 5 minutes, until translucent.

Whisk together the eggs, milk, italian seasoning, and red pepper with 1/2 tsp salt and 1/4 tsp pepper

Add in mushrooms, monterey jack, artichokes, spinach, and 1/2 of the parmesan cheese. 
Combine sauce mixture with pasta.  Pour into 9X13 pan.   Bake, COVERED, for 20 minutes.

Combine the rest of the parmesan with the bread crumbs, paprika, and melted butter.  Sprinkle over the top of the pasta.  Bake 10 minutes more.


We served this when we had company and EVERYONE loved it!  Even the 9 kids that were all around the table...that makes it a true keeper.